
Tutorial: How to Shoot Waterfalls
/It's no secret that waterfalls are a favorite subject of mine, I've done extensive research on where to find waterfalls in Colorado and I've even "found" some while hiking in remote areas of the state. One of the hardest elements of shooting a waterfall is how to make it look great because when we see a waterfall in person, it is easy to see the movement of the water and to feel/hear the water. However, since photographs are two-dimensional it can be hard to give a sense of motion without good lighting and proper gear. One of the most fun aspects of photographing waterfalls is the challenge that every waterfall presents; access to the waterfall, terrain challenges, and time of day.
In this tutorial, I'm going to give step by step directions to one of my favorite methods for shooting a waterfall. This is not meant to be the only way to shoot waterfalls and my best advice is to get creative with the gear you have; experiment with different angles, lenses, shutter speeds, apertures, etc.
That being said, one of the most pleasing methods for capturing the motion of a waterfall is to utilize long shutter speeds to create a silky ribbon of water. While capturing a waterfall without using long shutter speeds can be pleasing as well, using a slow shutter will make the water really pop.
Waterfall Photography Gear
First, you'll need an SLR camera or camera with the function to take long exposures. A long exposure is where the shutter of the camera is open for an extended period of time, generally over 1/4". To find this mode on a dSLR, you'll need to select the shutter speed. One way to do this is to have your camera in "shutter priority" mode. This linked article from cNet will help you find that mode on your camera.
Secondly, you'll need a tripod or a sturdy, flat base to set your camera on. When using a tripod, you'll want to setup where there will be very little movement and the tripod is resting securely on solid land.
Optionally, using a neutral density (ND) filter will help your photos by allowing you to take even longer exposures to really maximize the effect. ND filters come in all varieties and all sizes, be sure to do your research if considering going this route because you'll want to make sure you get a filter that is compatible with your lens(es) you'll be using.
Now that you have your gear, you'll need to find a waterfall. Finding the right waterfall can be tricky, but get out and explore your area for waterfalls and I'm sure you can find one that is suitable. When you find a waterfall you want to photograph, take time to compose the scene first. Look at many angles before taking any photos, try to visualize what the photo will look like and don't be afraid to experiment.
Once you have selected and composed your scene, you'll want to focus the camera on the waterfall and begin to set the settings you want to use. Since I'm recommending long exposures, you'll want to set your aperture smaller (or larger number) if you're photographing this waterfall during the day. If you have variable light, you may have to experiment a little more to get the settings. When I'm shooting a waterfall, I will typically set my aperture to ƒ/18 to make sure I can utilize long exposures. If you are using an ND filter, you may not need to use this small of an aperture. I will usually aim for an exposure of at least 1 second when shooting waterfalls because that's where the silky water effect really begins depending on the speed of the water.
Now comes the fun part, experimentation and learning from your results. As a photographer, you have to mindful of the conditions and always be on the lookout for an interesting feature or angle. Is there a patch of flowers near the shore of the water? Are people viewing the waterfall in front of the falls? Is the light shining through trees in an interesting way? These are all good questions to ask yourself because you want to take advantage of your surroundings when you are out shooting, look for something that is going to set your photo apart.
Here are some examples I have taken over the years of shooting waterfalls in Colorado. I have put the settings below the photo that I used for that photo along with the gear used.

Canon 5D Mark III, 17-40mm ƒ/4L, Manfrotto Tripod
20mm, 8 second exposure, ISO 50
Canon 5D Mark II, 17-40mm ƒ/4L, Manfrotto Tripod, B&W 3x ND filter
20mm, 20 second exposure, ISO 50

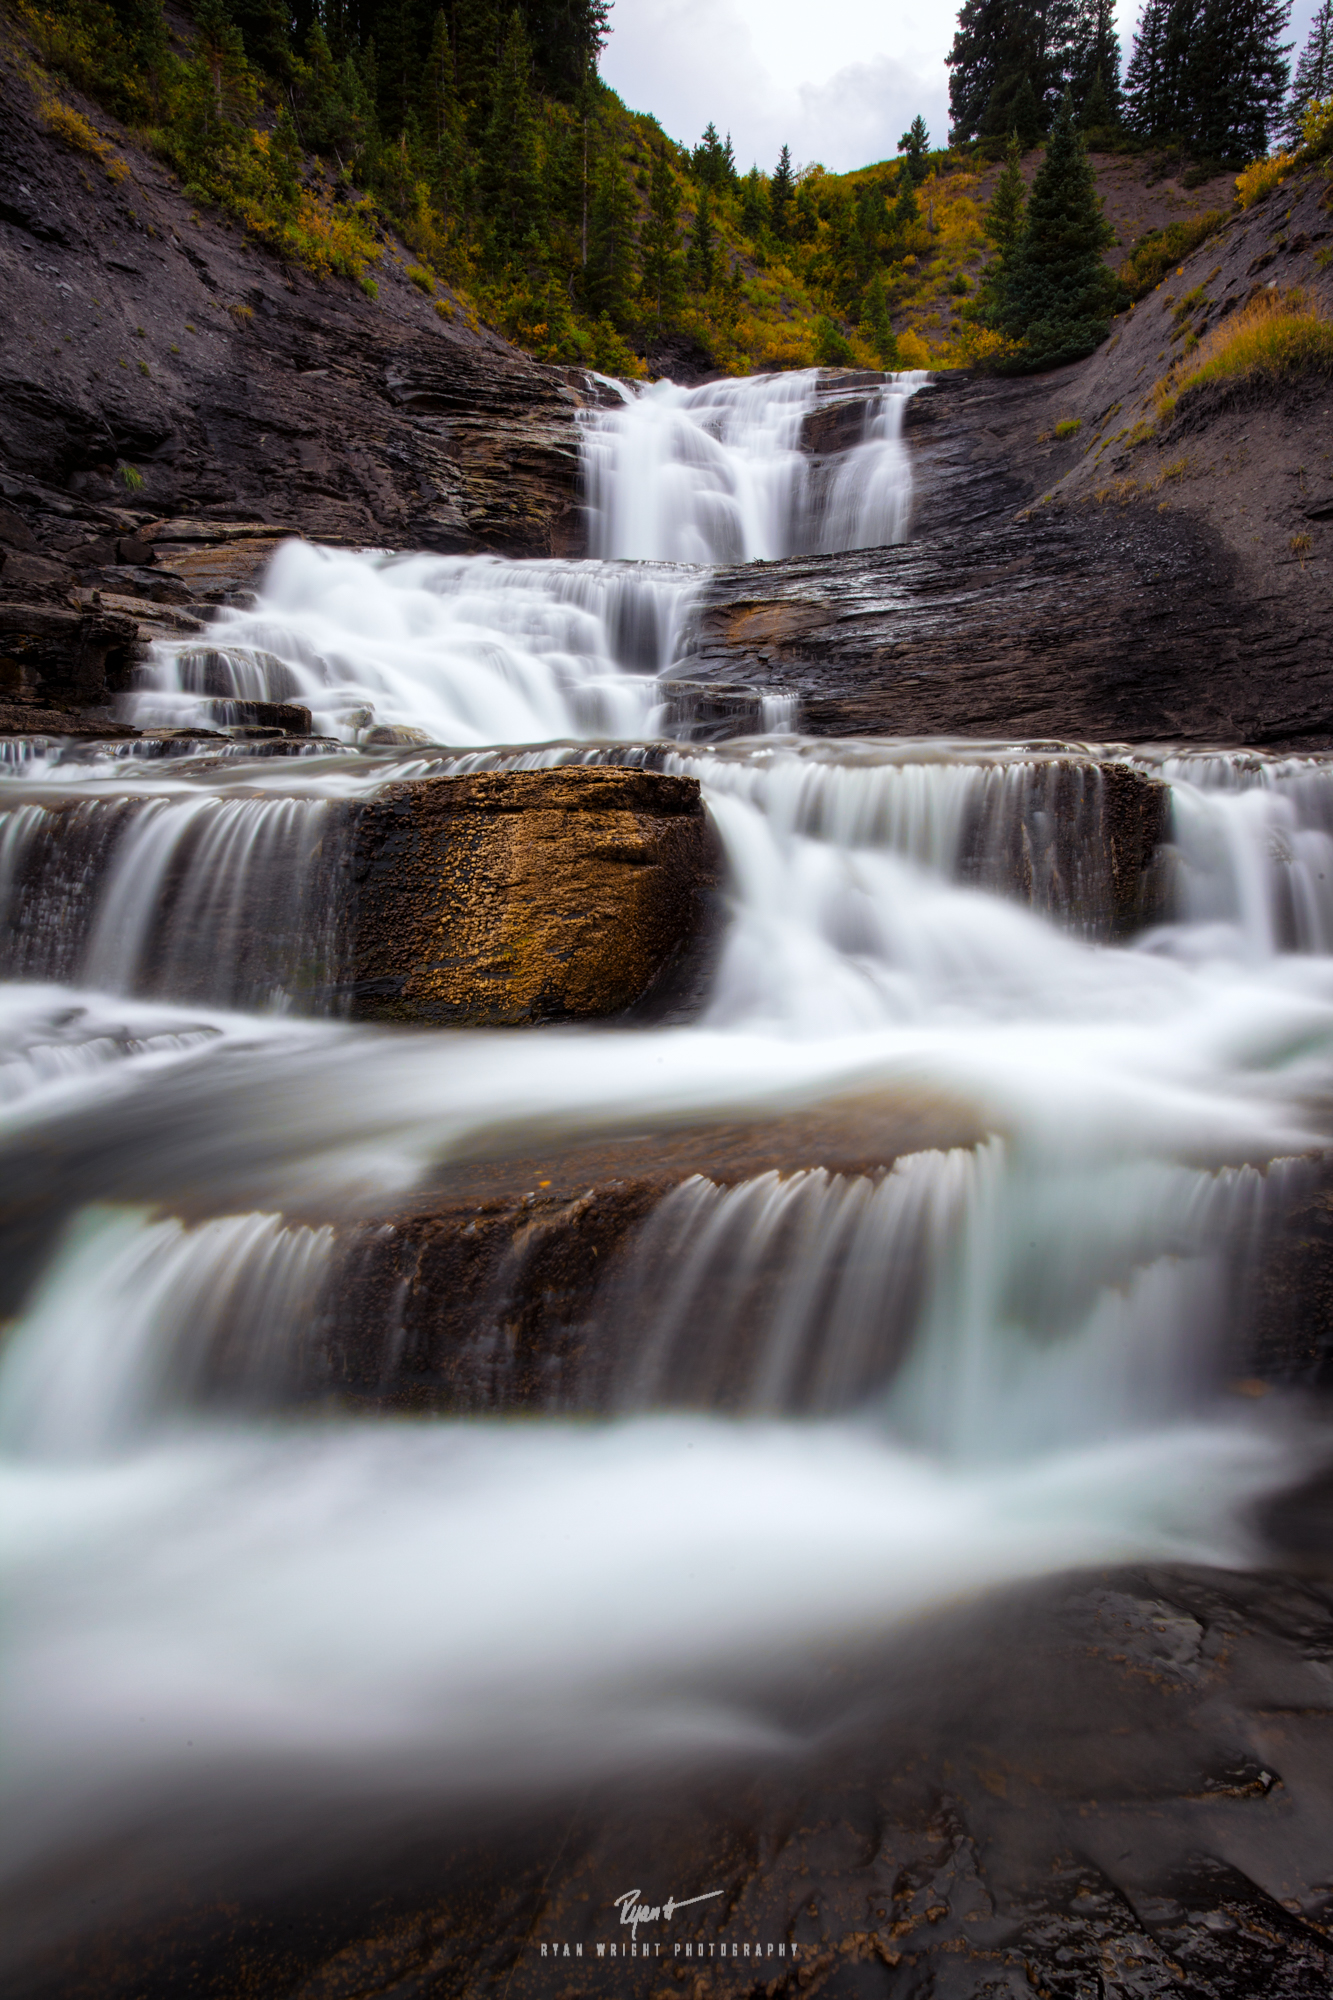
CAnon 5D Mark iii, 17-40mm ƒ/4L, Manfrotto tripod, B&W 3x nd filter
17mm, 2.5 second exposure, Iso 50, hdr
As always, you should experiment with different settings until you are satisfied with a result. If you have any questions about waterfall photography, please ask in the comments below and I'll be happy to ask them. If you'd like to purchase any photography, please contact me.
